Frantic Festive Finishes
Well we all know how busy the holidays get! Lots of party invites, family obligations and don’t forget all that Christmas shopping. Have you run out of time yet? One last – but critical element is the scene. Are you still scrambling for some last minute holiday decorating ideas? Don’t worry we have a few quick and modern ideas that will help to ensure your space looks festive while you have a holly jolly good time!
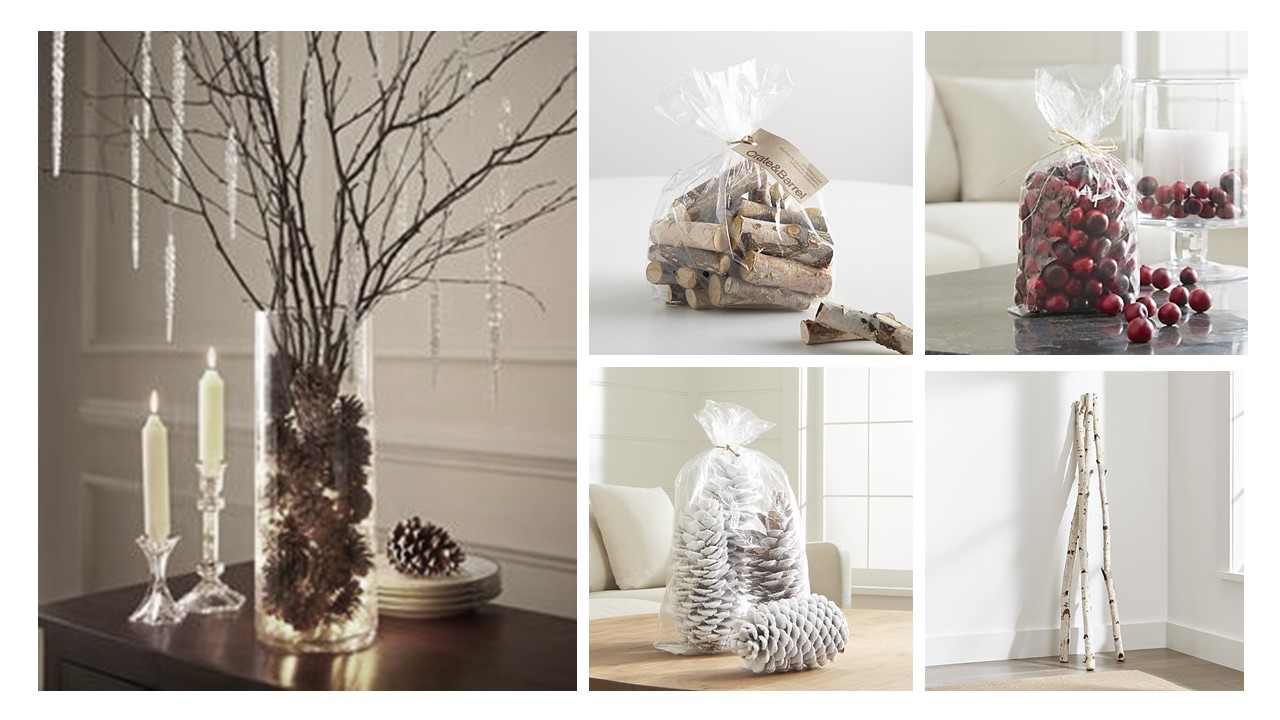
1) Quick fix vase ideas:
Fill a glass vase full of ornaments or flocked sugar pine cones or how about cranberries or mini birch tree cuttings and a single candle?

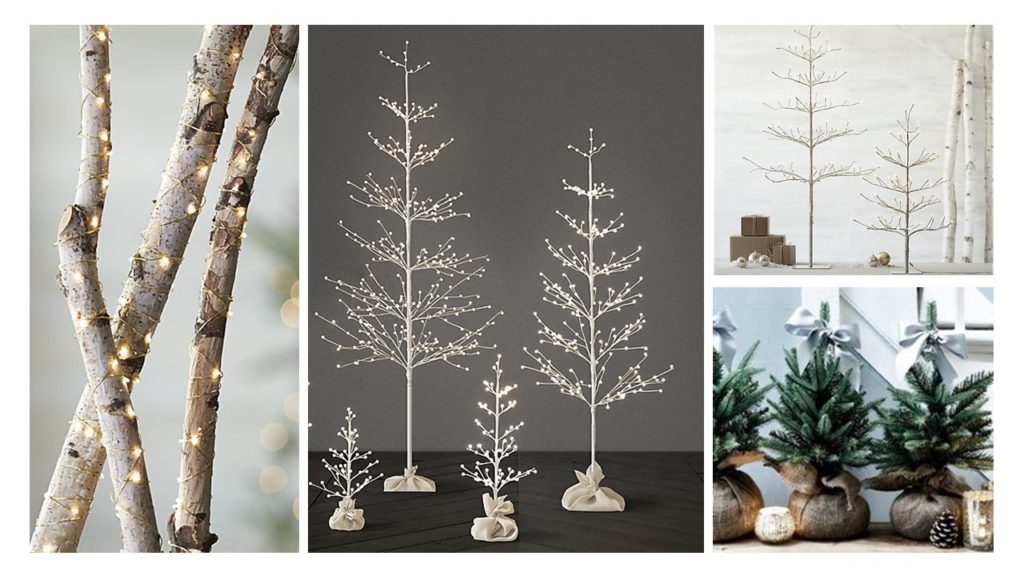
2) How about a no fuss Christmas tree?
Fill a floor vase with tall branches or twigs and leave au natural or hang a few ornaments of the ends? We love the simple minimalist birch LED trees like those found at Crate and Barrel or Restoration Hardware. You could cluster mini pine trees wrapped in burlap on a table or purchase a cute Charlie brown tree from your local florist. If you a modernist at heart, then why not go for a whimsical zig zag indoor or out “chrimsy warm light” tree.
3) Modern spin on that old wreath:
Go glam with the silver glitter wreath from crate & barrel. It makes a statement to any space and will create a sparkly focal for your winter wonderland. Or be a softy with the plush snowball wreath from CB2. Accessorize yours with twinkle lights or small pops of coloured ornaments to complete the look.
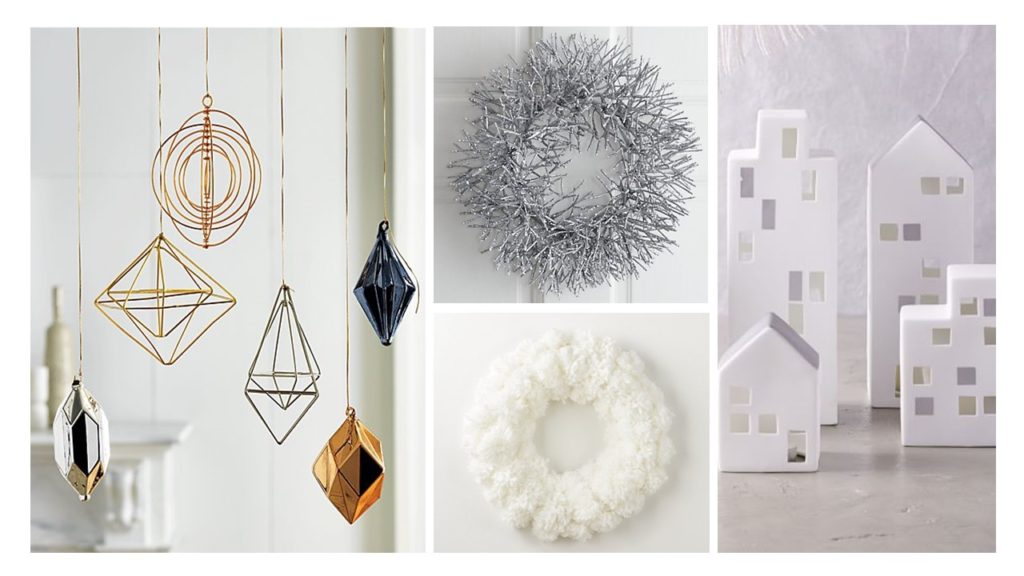
4) Going Geometric:
CB2 offers this modern spin on ornaments. These copper and silver framed Christmas trees will add some shine to any mantle display. Or dazzle your company with these out of this world galactic copper ornaments. These kinetic sculptures will hypnotize you as they spin and twirl in suspension, hanging from the tree or simply provide a focal on any surface.
5) Mantle Pieces:
Ever home needs a place to hang your stockings with care. Why not hang them with some style too? These metal weighted stocking hangers are one part functional and one part décor. Choose from a pair of antlers or a quaint little home which can be fitted with a candle to make your mantle merry. You can also choose to create a small village across your mantle with these porcelain cityscapes all from West elm. Want to add some life to the town? Complement your scene with silver reindeer from Crate & Barrel or acrylic polar bears from CB2. There’s nothing like a winter scene to make the season bright.
6) A Tree Topper:
You may be wondering how to top your tree after seeing the same old thing all the time. Dont worry we’ve got you covered – how about a starburst of light at the top? Sure to bring a unique look to any tree. Or how about a dance party around the tree?Why not try the disco ball tree topper for a little more fun? Too flashy? How about a simple silver rattan tree topper which adds a rustic yet classic look to your tree top.
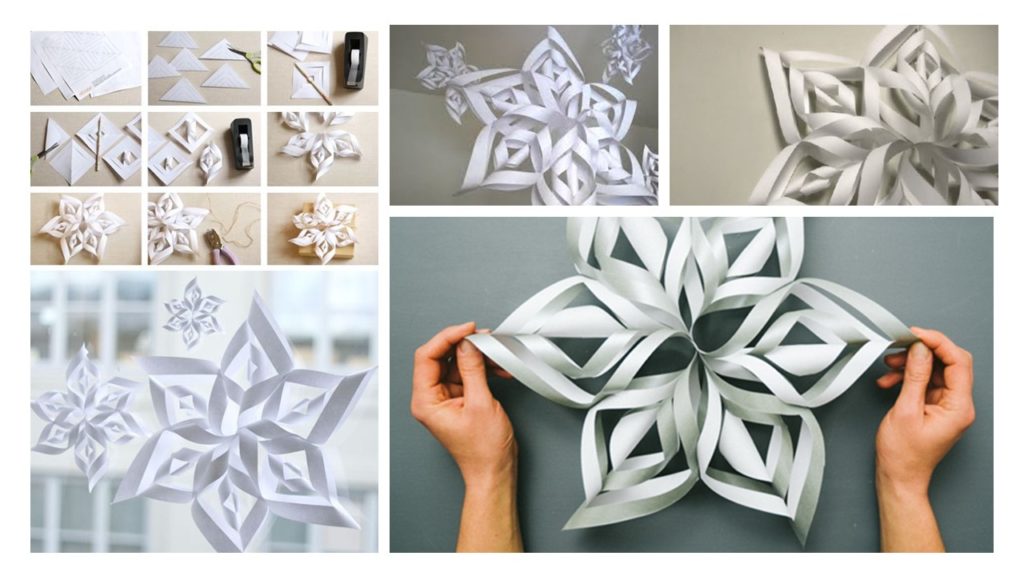
7) DIY 3D snowflakes:
Why not try these DIY simple 3D paper snowflakes? We even made them in our own office which were a big hit. Might make a fun family activity.
1. Fold a square piece of paper in half diagonally, then again into a quarter. Cut three straight lines into the folded piece of paper. (The space between each cut and how many cuts you need will depend on the size of your star).
- Open the piece of paper and cut in half, this will become your cutting template.
- Fold another square piece of paper in half diagonally and place your cutting template over the top of this. Cut along the cut lines.
- Open the square piece of paper you have just cut and flatten. Take the inner triangle cuts and bind the ends together with glue or a stapler.
- Take the next triangle cut and fix those ends together but this time in the opposite direction.6. Repeat this process until all ends have been fixed together to create the first point of your star.
- Repeat this process with the remaining 5 pieces of paper, creating 6 points to your star.
- Take 3 of your completed points and stick the top of the points together creating a semi-circle. Make sure that the star points are glued together facing the same direction.
- Repeat step 8 for the remaining 3 points of your star and staple both half’s together to secure. Your paper star is now complete!
- Suspend from your ceiling with a pushpin and a strand of fishing line. Add some variety by using different scales for a more dynamic look or for a more festive look, choose a coloured paper such as red, green or a frosty blue.6) Paint Swatch Christmas Trees:If you’re like most designers you should have a bunch of these lying around the house or office. If not, pop down to your local Paint or Hardware store for some colour charts. This is where you can have fun looking for some gradients or colour combos that speak to your Christmas spirit. Once you have made your choices, cut these into Christmas tree shapes and using a glue stick apply them to cards or even a wintery backdrop. You can complete the look by accessorizing your trees with paper ornaments and sticky stars. They also make great gift tags. Just don’t forget some brown swatches for trunks!
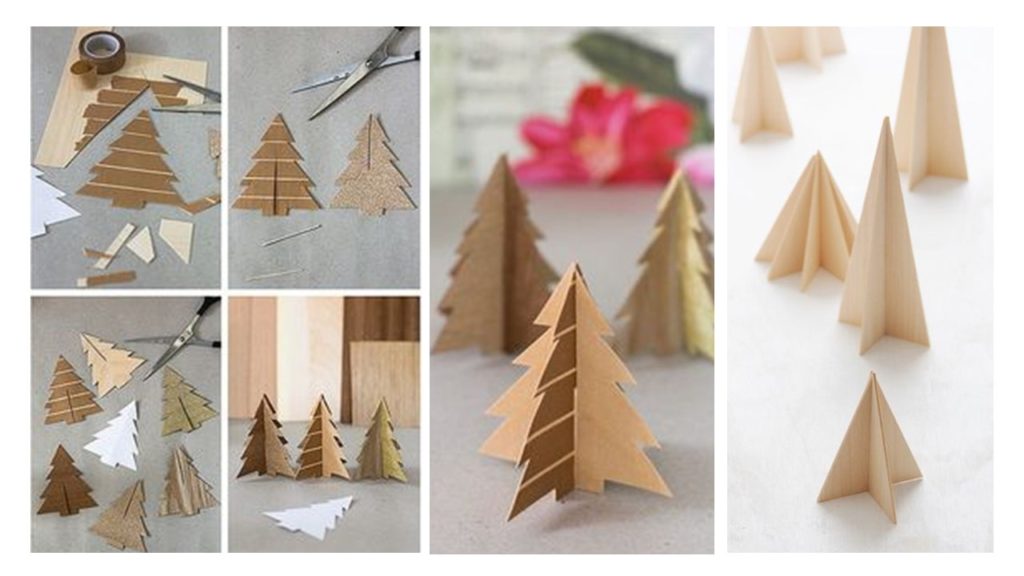
8) Wood Veneer Ornaments:
This one requires a strong hand and skills with a blade. Depending on your belief of skill level you can choose from a group of materials but cardstock, balsa wood or even a thin veneer sample will do wonders for these Scandinavian/rustic ornaments.
1. Begin by making a Christmas tree template out of paper.
2. Using this paper as your template, cut two Christmas tree shapes out of your material (balsa wood, veneer, cardstock). You have the option here to lay strips of craft paper tape across your tree to give it a snowy look, or using a glue stick coat your tree in glitter.
3. Cut a thin notch through the bottom of one tree (A) and through the top line of the other tree (B). Make sure these notches match each other in length.
4. Insert tree A into tree B and voila – your tree is complete!
Secure the pieces together with a glue gun or accessorize with a string to the top for a hanging ornament. No Time? No problem – merely display on your mantle as a small wooden forest. You can do this with any shape you wish, such as a minimal triangle to save time or any traditional Christmas shape (snowman, stars, angels) it’s up to you!
9) Warm/White Fairy lights:
Restoration hardware has a great choice of coloured lights, starry and globe LED versions that you can add into simple or frosted vase. Try an assortment of vases with these lights which are sure to add a little Christmas magic to any space. Place them on end tables, lower ones on coffee tables, or a variety across your mantle.
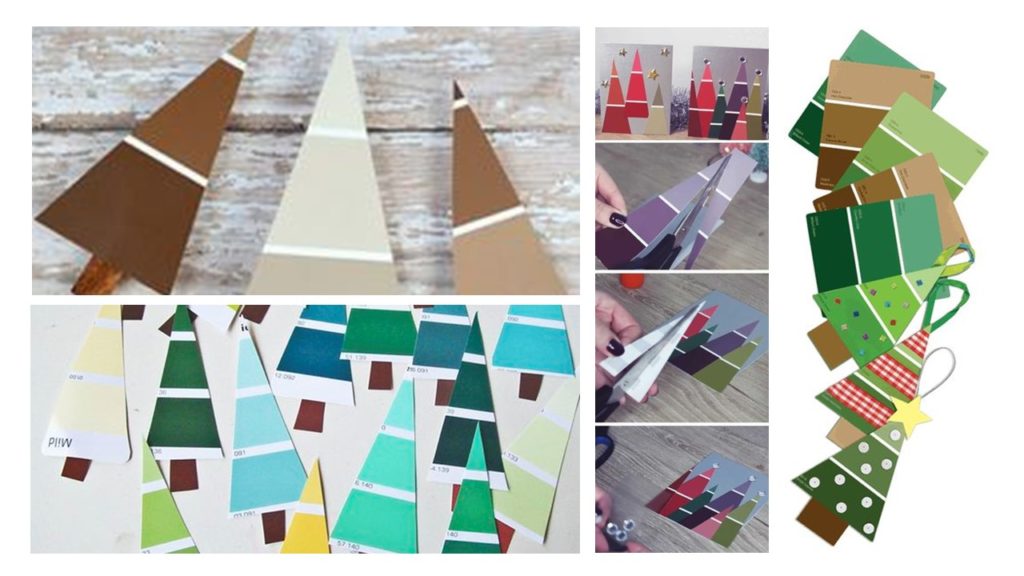
10)Paint Swatch Christmas Trees:
If you’re like most designers you should have a bunch of these lying around the house or office. If not, pop down to your local Paint or Hardware store for some colour charts. This is where you can have fun looking for some gradients or colour combos that speak to your Christmas spirit. Once you have made your choices, cut these into Christmas tree shapes and using a glue stick apply them to cards or even a wintery backdrop. You can complete the look by accessorizing your trees with paper ornaments and sticky stars. They also make great gift tags. Just don’t forget some brown swatches for trunks!
 Wishing you all a very Merry Christmas!